

Sewing machine tension sounds technical, but it comes down to one simple idea: the top thread and the bobbin thread should pull against each other evenly, so they lock together in the middle of the fabric. When one side pulls harder, you see loops, puckers or thread showing on the wrong side, and the seam looks messy even if you guided the fabric perfectly.
Most tension problems are not really tension problems. A thread that slipped out of the tension discs, a bent needle or a badly wound bobbin can all look the same. This guide shows you how to read your stitches, the order of checks that fixes most issues in minutes, and how to adjust the upper and bobbin tension safely. If your machine has several issues at once, start with our wider sewing machine troubleshooting guide and come back here for tension.
This post contains affiliate links. As an Amazon Associate I earn from qualifying purchases, at no extra cost to you.
How Sewing Machine Tension Works
A household machine makes a lockstitch. The needle carries the top thread down through the fabric, a hook catches it below the needle plate and wraps it around the bobbin thread, and the take-up lever pulls the knot back up. On a balanced stitch, that knot sits hidden between the fabric layers, so you only see top thread on top and bobbin thread underneath.
Two parts control the pull. The upper tension comes from a pair of discs that squeeze the top thread; the dial on the front or top of the machine changes how hard they squeeze. The lower tension comes from a small spring on the bobbin case, set by a tiny screw. On most machines the bobbin tension is set at the factory and rarely needs changing, which is why the upper dial is almost always the right place to start.
How to Read Your Stitches
Before you touch any dial, look closely at a line of stitching from both sides. The stitches tell you exactly which way to go, and reading them saves a lot of guessing.
| What you see | What it means | First fix |
|---|---|---|
| Smooth stitches on both sides, no dots of the other color | Balanced tension | Nothing to change |
| Bobbin thread pulled up to the top as small dots | Upper tension too tight | Turn the dial to a lower number |
| Top thread lying flat or looping on the underside | Upper tension too loose, or thread out of the discs | Rethread, then turn the dial higher |
| Big tangled nest under the fabric | Top thread missed the tension discs | Rethread with the presser foot up |
| Fabric gathers or puckers along the seam | Tension too tight, or wrong needle or stitch length | Lower the tension one step and test |
A quick tip makes this much easier: put a contrasting color in the bobbin for your test, such as dark thread on top and light thread underneath. Any thread that crosses to the wrong side shows up straight away.

Check These Before You Change the Tension
Run through these checks first. Each one takes less than a minute, and together they solve most of the problems that look like tension trouble.
- Rethread the top thread completely with the presser foot raised. The foot opens the tension discs; if you thread with it down, the thread rides on top of the discs and gets almost no tension, which causes loops underneath.
- Check that the spool cap is on and the thread is not catching on a notch in the spool.
- Take out the bobbin and check that it is wound evenly and inserted the right way round. Our guide on how to wind and insert a bobbin shows the details.
- Fit a new needle of the right type and size for your fabric. A dull or bent needle causes skipped stitches and loops; see sewing machine needle sizes and types.
- Brush lint out of the bobbin area and from between the tension discs with a small brush, following your manual.
- Use the same weight of thread on top and in the bobbin while you test.
Only when the problem is still there after all six checks is it time to turn the dial.
How to Adjust the Upper Tension Step by Step
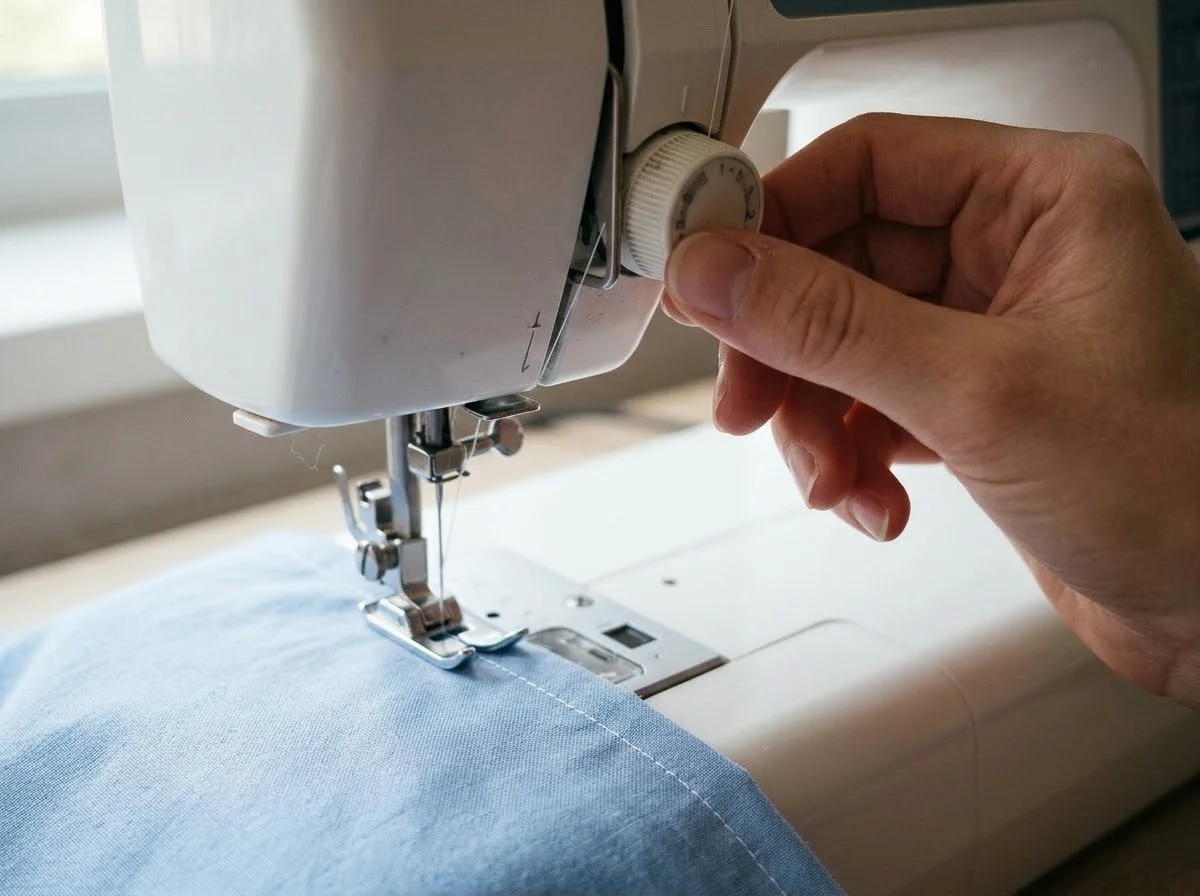
Write down the number your dial shows now, so you can always go back. Many machines mark their standard setting, often around 4, but check your manual for yours.
- Cut two scraps of the fabric you are sewing and stack them, just like a real seam.
- Sew a straight line about 10 cm (4 inches) long at your normal stitch length.
- Look at both sides. If bobbin thread shows on top, turn the dial down one number. If top thread shows underneath, turn it up one number.
- Sew a new test line next to the first one and compare.
- Repeat until the knots disappear between the layers. Some dials allow half steps, which helps with fine fabrics.
Change only one thing at a time. If you change the tension, the stitch length and the needle together, you will not know which change fixed the problem. Once the stitch looks right, note the setting for that fabric; many sewists keep a small card with their best settings for cotton, denim and knits.
When and How to Adjust the Bobbin Tension
If the upper dial is at its lowest or highest setting and the stitch is still unbalanced, the bobbin case may be the cause. Treat this as a last resort and make tiny changes, because the bobbin screw is very sensitive.
On a front loading machine with a removable metal bobbin case, first mark the screw position with a fine permanent marker so you can return to it. Then turn the small screw on the side of the case no more than a quarter turn at a time: clockwise to tighten, counterclockwise to loosen. A common home check is the drop test: hold the thread end with the bobbin in its case and give a small upward bounce. With balanced tension the case slips down a little and stops; if it falls freely, the tension is too loose, and if it does not move at all, it is too tight. Test on a scrap after every small turn.
Drop-in bobbin systems are usually set in the needle plate area, and many manuals advise leaving them alone. If your drop-in machine still sews badly after rethreading, a new needle, a clean bobbin area and upper tension changes, a service visit is the safer choice. Never turn a screw you cannot identify in your manual.
Tension for Different Fabrics and Stitches
There is no single perfect number, because the right tension depends on the fabric, the thread and the stitch. Lightweight fabrics such as voile and chiffon often pucker at the standard setting, so try a slightly lower tension along with a fine needle. Thick fabrics and several layers of denim can need a little more or a little less depending on the machine, which is why a test on a real scrap matters more than any chart.
Heavier topstitching thread usually needs a lower upper tension so it can lie smoothly. Wide zigzag and satin stitches look best when the top thread pulls just slightly to the underside, so many sewists lower the upper tension a step for decorative stitching. Stretch fabrics need a stretch or ballpoint needle and a stretch stitch more than a tension change; if the seam pops when you pull it, the stitch choice is usually the issue. Keep a seam ripper next to the machine while you test, because unpicking a test line is quicker than starting a new scrap every time.
Common Tension Mistakes
The biggest mistake is turning the dial before rethreading. A thread that has jumped out of the tension discs will not respond to the dial at all, and beginners often turn it all the way up and then wonder why nothing changes. Always rethread with the foot up first.
Other common mistakes are adjusting the bobbin screw too early or by too much, testing on a single layer of fabric when the real seam has two, using a different thread in the bobbin from the top, and forgetting to lower the presser foot before sewing. With the foot up, the discs stay open, the top thread has no tension and you get a nest underneath in the first few stitches.
FAQ
What number should my sewing machine tension be on?
Many machines use a standard setting around 4 on a 0 to 9 dial, but the right number varies by machine, fabric and thread. Check your manual for the default, then fine tune with a test seam.
Why is the bobbin thread showing on top of my fabric?
The upper tension is too tight compared with the bobbin. Turn the upper dial to a lower number one step at a time. If that does not help, check that the bobbin is in the right way and the thread is under the case spring.
Why are there loops on the bottom of my fabric?
Loops underneath usually mean the top thread is too loose, most often because it is not seated between the tension discs. Rethread with the presser foot up, then raise the upper tension a step if needed.
Should I adjust the bobbin tension?
Only as a last resort, after rethreading, changing the needle, cleaning the bobbin area and trying the full range of the upper dial. Mark the screw first and turn it no more than a quarter turn at a time.
Does tension need to change for different fabrics?
Often a little. Fine fabrics may need slightly lower tension, and heavier threads or decorative stitches can need adjustments too. Always test on a doubled scrap of the fabric you are using.
The Bottom Line
Good tension means the top and bobbin threads meet in the middle of the fabric. Read your stitches from both sides, rethread with the presser foot up, check the bobbin and needle, and only then change the upper dial one step at a time on a doubled test scrap. Leave the bobbin screw for last and make tiny, marked turns. With this order, most tension problems take minutes to fix. For a closer look at how a lockstitch forms, the lockstitch article on Wikipedia has a clear explanation, and when you are ready to sew a real project, our easy apron pattern is a great first seam test. If you are still choosing a machine, many of the beginner sewing machines we cover have clearly marked tension dials.