
You do not need a sewing machine to mend a seam, close a cushion or hem a pair of trousers. A handful of basic hand sewing stitches covers almost every small repair, and once you know which stitch does which job, hand sewing becomes calm, quick and surprisingly neat.
This guide explains what you need, how to start and finish a thread so it never pulls out, and how to sew each of the six stitches step by step, with a table to help you choose the right one. For a wider overview of getting started, see our complete guide to hand and machine sewing.
This post contains affiliate links. As an Amazon Associate I earn from qualifying purchases, at no extra cost to you.
What You Need for Hand Sewing
Hand sewing needs very little, and good basics make a real difference to how easy it feels.
- Hand sewing needles in a few sizes (sharps are the all-round choice)
- All-purpose polyester or cotton thread that matches your fabric
- Small sharp scissors or thread snips
- Pins or sewing clips
- A thimble for thick fabric (optional but helpful)
- A fabric marker or chalk for straight lines
A mixed pack of assorted hand sewing needles lets you try different lengths and eye sizes until you find one that feels comfortable. Short needles give more control for tiny stitches, while longer needles are faster for basting and gathering.
How to Start and Finish Your Thread
Cut a length of thread about as long as your arm, roughly 45 to 60 cm (18 to 24 inches). Longer thread tangles and wears thin as it passes through the fabric again and again. Thread the needle and decide whether to sew with a single strand (most seams and hems) or a doubled strand (buttons and heavy repairs, as in our guide on how to sew a button by hand).
To start, tie a small knot at the end: wrap the thread twice around your index finger, roll it off with your thumb and pull it tight. Begin on the wrong side of the fabric so the knot stays hidden. To finish, take a tiny stitch on the wrong side, pass the needle through the loop before it closes, and pull it into a knot. Do this twice, then trim the tail to about 5 mm. A double tie-off keeps the stitching from working loose in the wash.
1. Running Stitch
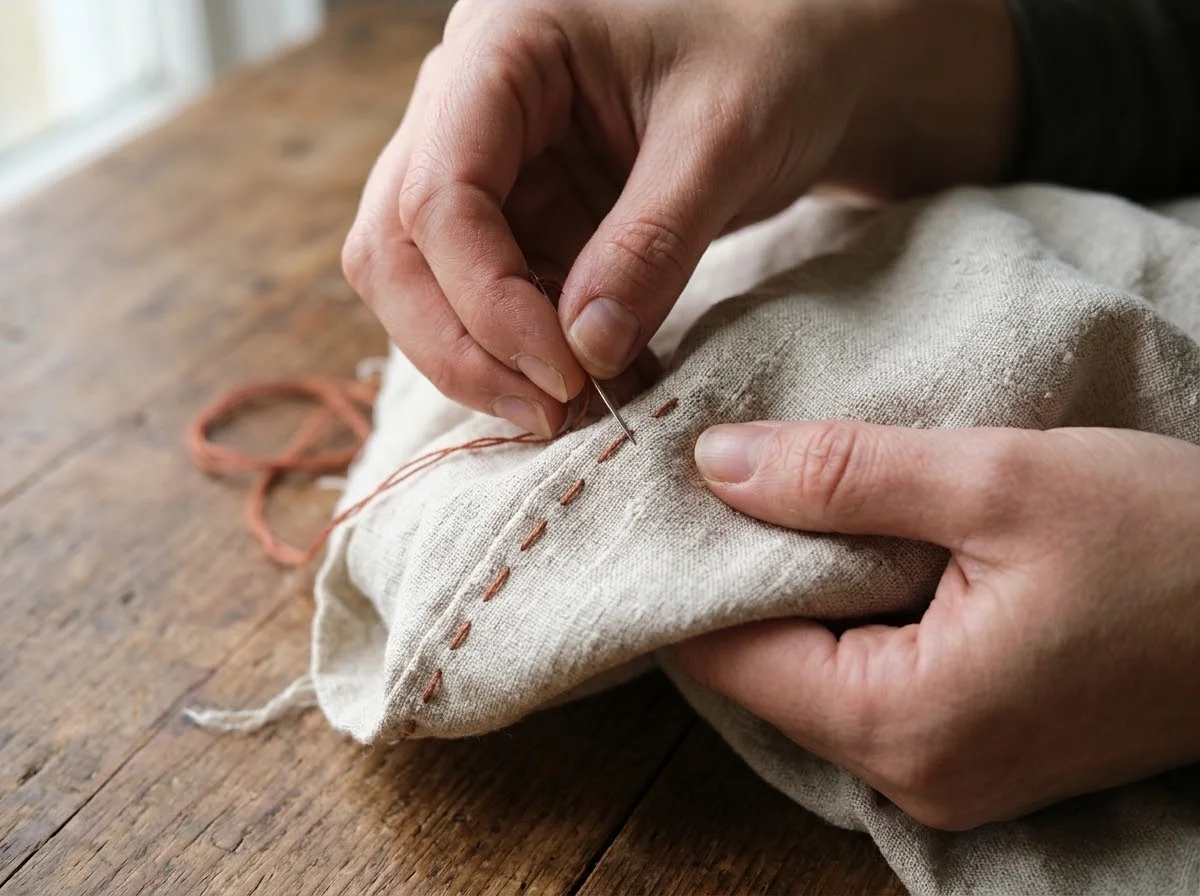
The running stitch is the simplest hand stitch and the base of many others. It is a line of evenly spaced stitches that go over and under the fabric, used for quick seams that will not take much strain, gathering fabric and decorative lines.
- Bring the needle up from the wrong side at the start of your line.
- Push it down about 3 to 5 mm further along, then up again the same distance ahead.
- Load two or three stitches onto the needle at a time before pulling the thread through.
- Keep the stitches and gaps the same length for a neat line.
For gathering, use longer stitches and leave a long tail; pulling the thread then bunches the fabric evenly.
2. Basting Stitch
A basting stitch is a long, loose running stitch that holds fabric in place temporarily, for example to check fit or to keep slippery layers from shifting before the final seam. Make the stitches about 1 to 2 cm long, use a contrasting thread color so it is easy to spot, and do not tie a firm knot at the end. Once the permanent seam is in, snip the basting thread every few stitches and pull it out.
3. Backstitch
The backstitch is the strongest basic hand stitch. From the front it looks like a continuous line of machine stitching, which makes it ideal for repairing split seams in clothes, sewing seams that will be stretched or washed often, and outlining.
- Bring the needle up one stitch length ahead of where the line starts.
- Go back down at the start point, making one stitch backwards.
- Bring the needle up one stitch length ahead of the first stitch.
- Go back down at the end of the previous stitch, so the stitches touch.
- Repeat, always stepping forward underneath and back on top.
Keep the stitches small, about 3 mm, for seams in clothing. The tighter and more even they are, the stronger the seam.
4. Ladder Stitch
The ladder stitch, also called the invisible or blind stitch, closes an opening from the right side so the stitches disappear. It is the stitch to use for closing the gap in a cushion cover, the turning hole in a lined bag or the opening of a stuffed toy.
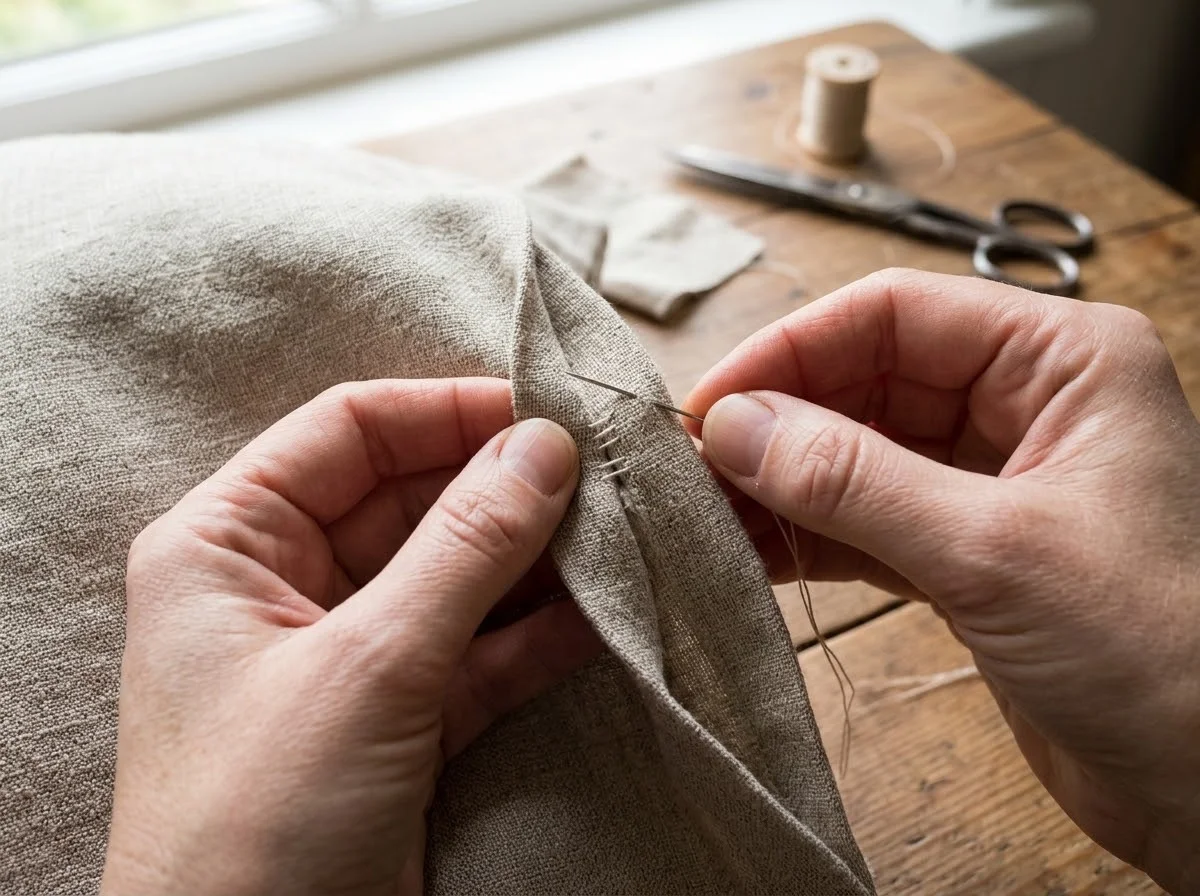
Fold both edges of the opening inward along the seam line. Bring the needle up from inside the fold on one side. Take a small stitch straight across into the fold on the other side, running the needle about 3 to 5 mm along inside the fold before coming out. Cross straight back to the first side and repeat. The thread looks like the rungs of a ladder. After five or six stitches, pull the thread gently and the two folds close together with no visible stitches.
5. Whipstitch
The whipstitch wraps over the edges of fabric to join them. It is quick and works well for felt projects, joining two finished edges, attaching patches and stopping fabric edges from fraying.
Hold the two edges together. Bring the needle up through both layers close to the edge, take the thread over the top of the edges and push the needle through again from the same side a few millimeters along. Keep the stitches the same depth and spacing. The thread slants over the edge, which is part of the look on felt and crafts.
6. Slip Stitch for Hems
The slip stitch is a hemming stitch that is almost invisible from the right side. It is perfect for trouser hems, skirt hems and the edges of linings.
- Fold and press the hem in place.
- Bring the needle out through the folded edge of the hem.
- Pick up just one or two threads of the main fabric directly above.
- Slide the needle back into the fold and travel about 5 to 8 mm inside it.
- Come out of the fold and repeat.
Because each stitch catches only a couple of threads of the outer fabric, the hem barely shows on the right side. Do not pull the thread tight, or the hem will pucker.
Which Hand Stitch Should You Use?
| Stitch | Strength | Visible from the front? | Best for |
|---|---|---|---|
| Running stitch | Light | Yes, as a dashed line | Quick seams, gathering, decoration |
| Basting stitch | Temporary | Yes, removed later | Holding layers, fittings |
| Backstitch | Strong | Yes, looks like machine stitching | Seam repairs, stretched seams |
| Ladder stitch | Medium | No | Closing openings in cushions, bags and toys |
| Whipstitch | Medium | Yes, slanted over the edge | Felt, patches, joining edges |
| Slip stitch | Light to medium | Almost invisible | Hems and linings |
Common Hand Sewing Mistakes
The most common problem is thread that tangles and knots by itself. Use a shorter length, let the needle hang down every so often so the thread untwists, and run the thread over a bit of beeswax or a thread conditioner if it keeps twisting. Pulling every stitch too tight is another easy mistake; it puckers the fabric, so pull just until the thread lies flat.
Other mistakes are starting with the knot on the right side, using thread that does not match the fabric weight, making stitches of different lengths and skipping the double tie-off at the end. Pressing your work with an iron before and after sewing also makes a big difference, because pressed folds are far easier to stitch neatly.
FAQ
What is the strongest hand sewing stitch?
The backstitch is the strongest basic hand stitch. Because each stitch overlaps the last, it holds like a machine seam and works well for repairing clothes.
Which hand stitch is invisible?
The ladder stitch is invisible when closing an opening from the right side, and the slip stitch is nearly invisible for hems. Both rely on hiding the thread inside a fold.
Should I use a single or double thread for hand sewing?
Use a single strand for most seams, hems and invisible stitches, because it looks neater. Use a doubled strand for buttons, heavy fabrics and repairs that need extra strength.
How long should my thread be for hand sewing?
About 45 to 60 cm (18 to 24 inches), roughly the length of your arm. Longer thread tangles more and wears out before you reach the end.
What is the difference between a running stitch and a basting stitch?
They are sewn the same way, but a basting stitch is longer and temporary. You remove basting after the permanent seam is sewn, while a running stitch stays in.
The Bottom Line
Six stitches cover almost every hand sewing job: the running stitch for quick seams, basting to hold layers, the backstitch for strong repairs, the ladder stitch to close openings invisibly, the whipstitch for edges and felt, and the slip stitch for neat hems. Start with a hidden knot, keep your stitches small and even, and finish with a double tie-off. Practice each one on a scrap for a few minutes and you will be ready for real repairs. For background on the oldest of these stitches, see the straight stitch article on Wikipedia, which also covers the running stitch. When you move to the machine, our guide to threading a sewing machine is the next step, and you can practise decorative hand stitches with our hand embroidery stitches for beginners.