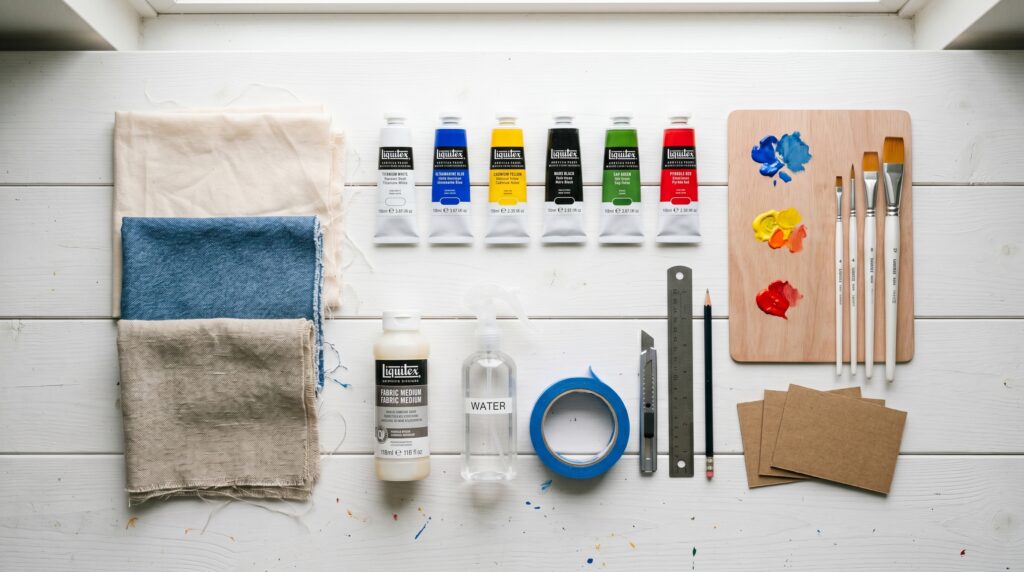
You already own everything you need to start. A tube of acrylic paint, a brush, and an old piece of fabric are all it takes to create something genuinely beautiful. No art degree required. No expensive equipment. Just a process that works when you follow it correctly.
The problem is that most people skip the one step that makes the difference between a design that lasts years and one that cracks and peels after two washes. This guide covers that step, and every other step, so your first attempt comes out looking like you have been doing this for years.
Can You Use Acrylic Paint on Fabric?
Yes, and it works better than most people expect.
Acrylic paint bonds to almost any surface. Fabric is no different. The challenge is not getting the paint to stick in the first place. The challenge is keeping it flexible enough to survive real-world use.
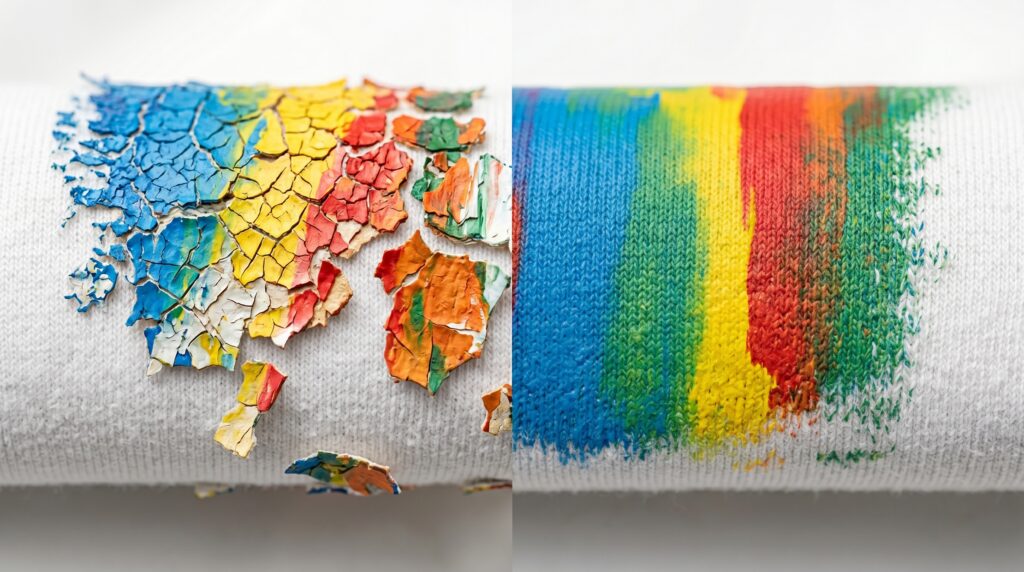
Think about it this way. A canvas painting hangs on a wall and never moves. A painted t-shirt bends every time you sit down, stretches every time you raise your arm, and goes through the washing machine twice a week. Standard acrylic dries into a rigid film. That film cannot handle constant movement. It cracks, lifts at the edges, and eventually flakes off completely.
The fix is one ingredient that changes everything. Add it to your paint before you start and your design stays soft, flexible, and fully bonded to the fabric through years of wear and washing.
The “Secret Ingredient”: Why Fabric Medium is Non-Negotiable
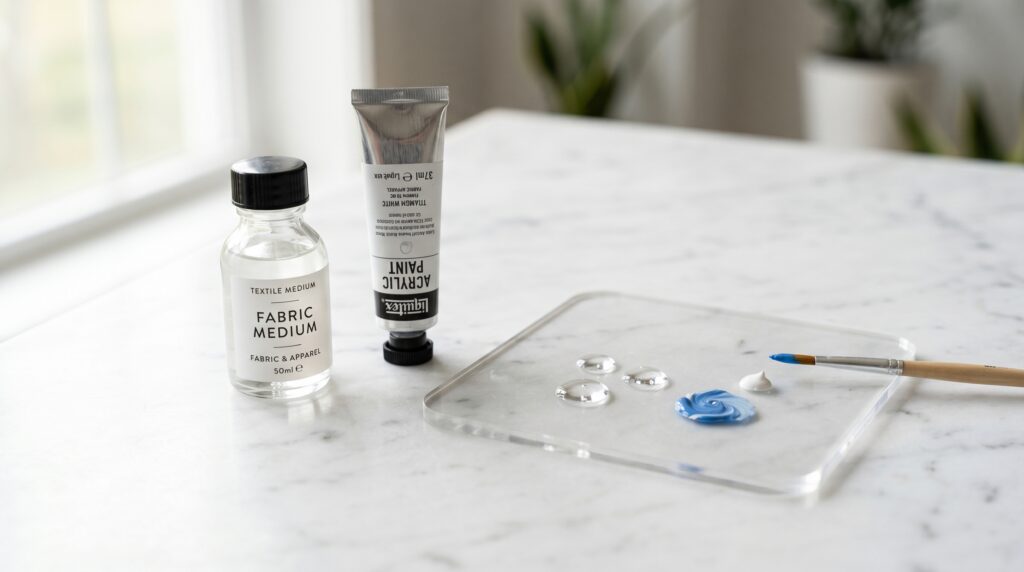
That ingredient is fabric medium.
Fabric medium is a clear liquid additive you mix directly into acrylic paint before applying it to any textile. It does not change the color. It does not weaken the pigment. What it does is completely change how the dried paint behaves.
Without fabric medium, acrylic paint dries on top of the fabric fibers. Water and agitation during washing gradually lift that surface layer and carry it away. The design fades with every wash until nothing is left.
With fabric medium mixed in, the paint penetrates into the fiber structure itself. It becomes part of the textile rather than a coating sitting on top of it. The result is a design that flexes with the fabric, resists washing, and holds its color for years.
Here is what fabric medium does in practical terms.
1. Structural Integrity and Flexibility
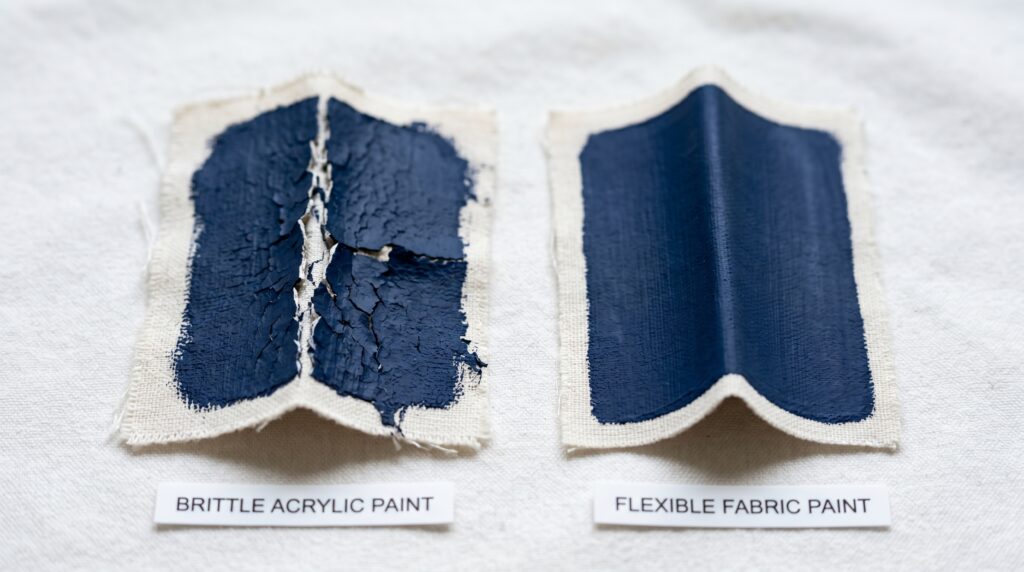
Standard acrylic dries into a hard plastic layer. On a garment, that means the painted area feels stiff and uncomfortable. Move the fabric and the layer cracks almost immediately.
Fabric medium changes the polymer structure of the dried paint from rigid to flexible. The painted surface bends when the fabric bends. It stretches without splitting. It snaps back without leaving any surface damage. The finished garment feels soft and comfortable rather than cardboard-stiff in the painted areas.
2. Enhanced Adhesion and Wash-Resistance
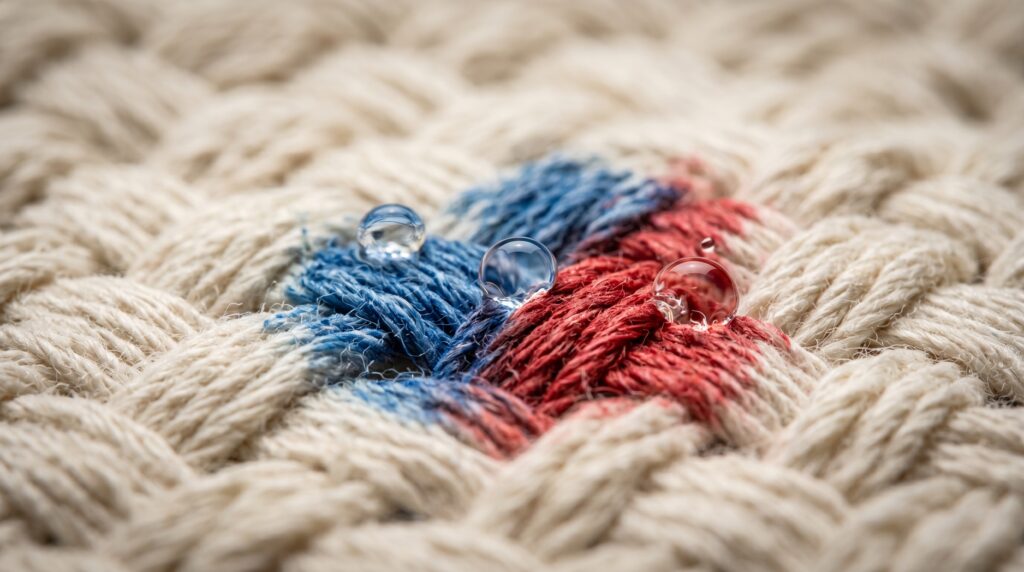
A surface bond breaks down under repeated washing. A fiber bond does not.
Fabric medium acts as a deep-penetration binder that drives pigment into the weave rather than leaving it sitting on top of the threads. Once cured, the color lives inside the fabric structure. Washing removes surface dirt. It cannot touch the paint bond underneath.
3. Advanced Artistic Control

Fabric medium also makes the painting process easier. It improves the flow of the paint so it spreads smoothly without dragging or streaking across the surface. It extends the time before the paint starts to dry, which gives you more room to blend colors and work gradients without rushing. And it allows you to thin the paint down to a watercolor-like wash without losing any of the pigment’s adhesion strength.
Step 1: Strategic Preparation and Material Selection
Experienced fabric painters spend more time on preparation than on the actual painting. That is not an accident. The prep work determines the quality of the finished piece before a single drop of paint touches the fabric.
Choosing Your Canvas: Material Compatibility
The fabric you choose matters more than most beginners realize. The same paint applied with the same technique will give you completely different results on different materials.
| Fabric | How It Performs | Best Projects |
|---|---|---|
| 100% Cotton | Excellent. Rich, deep color saturation | T-shirts, tote bags, casual wear |
| Canvas | Excellent. Extremely durable long term | Shoes, bags, wall hangings |
| Silk | Vibrant. Allows fine detailed work | Scarves, blouses, delicate pieces |
| Linen | Good. Natural texture adds character | Cushion covers, aprons, table runners |
| Denim | Good. Bold graphic designs work best | Jackets, jeans, patches |
| Polyester blends | Fair. Needs extra surface preparation | Activewear, synthetic garments |
| Velvet or terry cloth | Difficult. Use a stiff stippling brush | Decorative display items only |
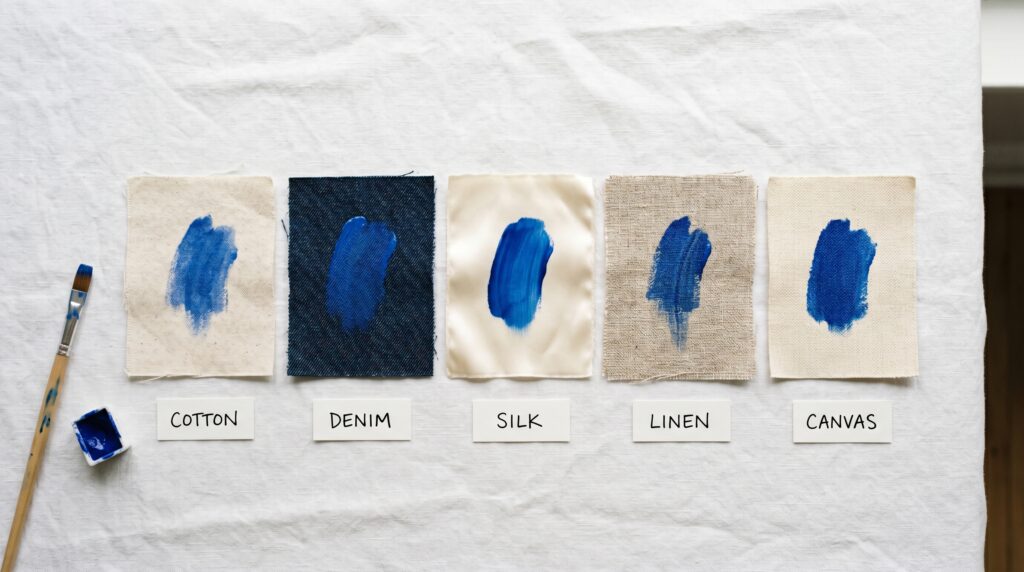
Start with 100% cotton if you are new to this. It absorbs paint evenly, holds color reliably, and gives you a forgiving surface to work on. A cheap plain cotton tee makes the perfect first project. Practice on that before you touch anything you actually care about.
Read More: How to Use Fabric Paint on Clothes
The Pre-Painting Checklist
Pre-wash the fabric before you do anything else.
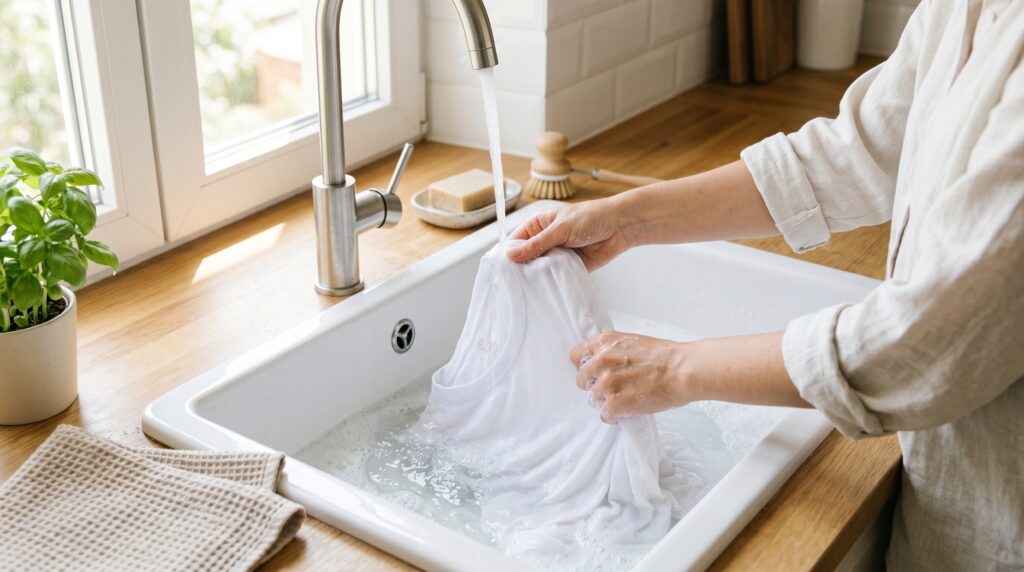
New fabric carries an invisible coating called industrial sizing. Manufacturers apply this starch-like finish to make fabric look crisp and smooth on shop shelves. It also completely blocks paint adhesion. Paint applied over sizing looks fine at first and then peels off after the first wash.
Wash the fabric with regular detergent and skip the fabric softener entirely. Softener leaves its own coating on the fibers that causes the same adhesion problem. Dry the fabric fully, then iron it flat before you start painting.
Insert a barrier inside the garment.
Slip a piece of cardboard or foam board inside any garment before you open a paint tube. Wet paint soaks straight through to the back layer and ruins the other side. The barrier prevents that. It also creates a firm, flat surface that is much easier to work on than soft, unsupported fabric.
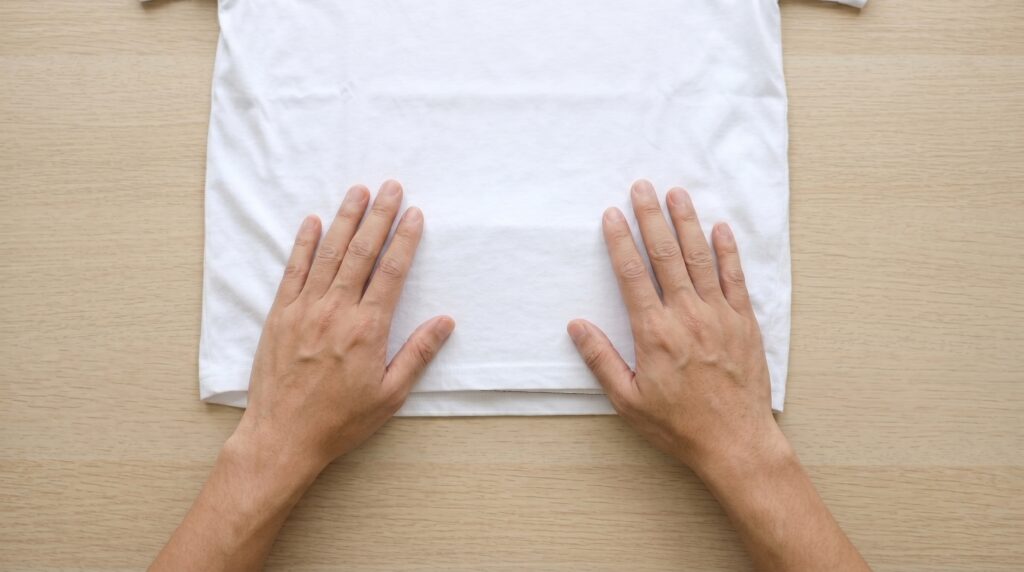
Stretch and secure the fabric.
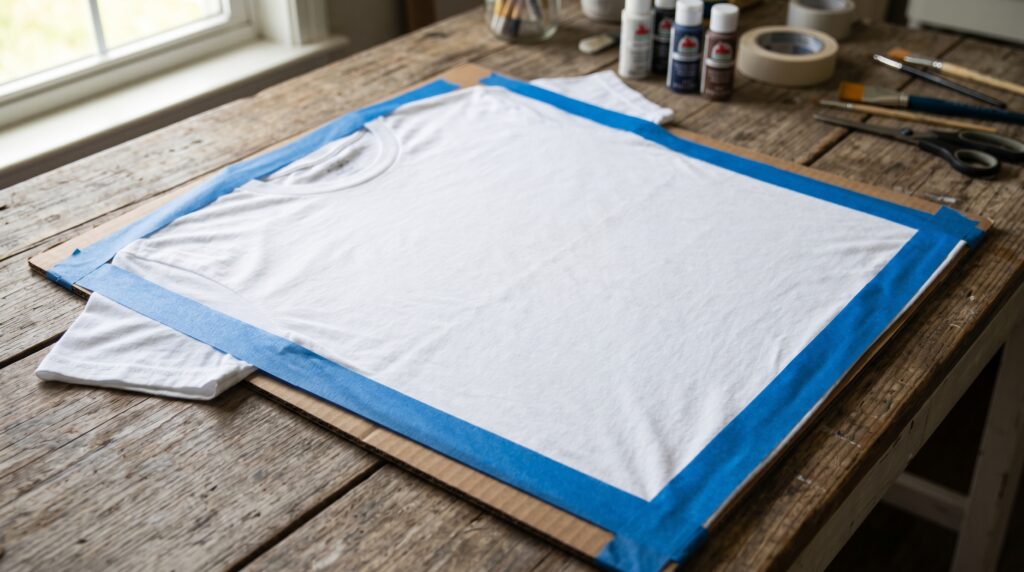
Pull the fabric lightly over the board and tape the edges down. A taut, even surface lets the brush move smoothly and ensures consistent paint pressure across the whole design area. Loose or bunched fabric creates uneven absorption and patchy coverage that no amount of skill can fix after the fact.
Step 2: Master Application Techniques
Good preparation sets you up to succeed. Application technique is where the actual quality of the finished piece gets decided.
Priming the Fabric with Moisture
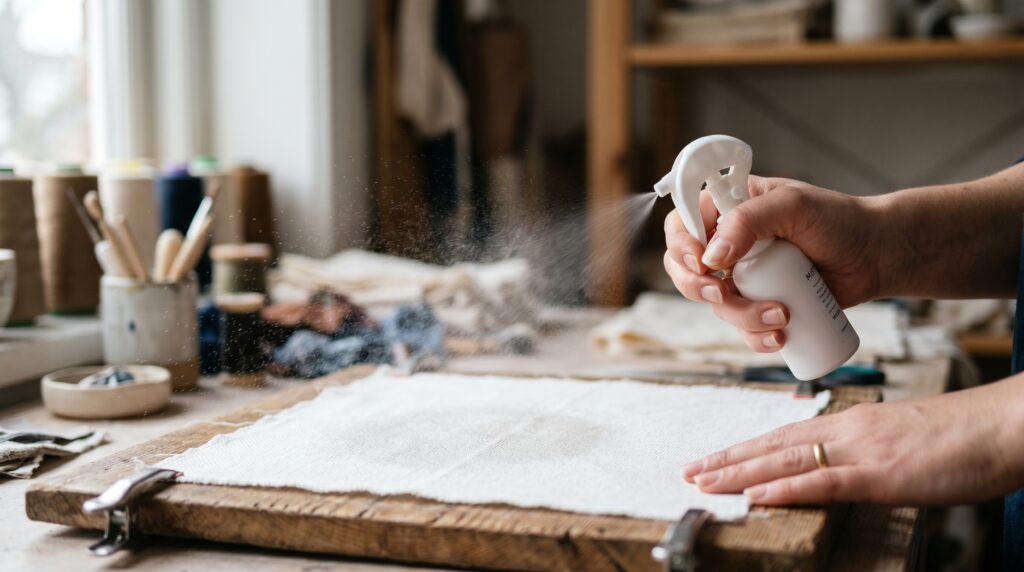
Before you load a brush, mist the painting area lightly with a spray bottle. The fabric should feel damp, not wet. Wet your hand and touch the fabric. That level of dampness is about right.
A damp surface pulls the paint down into the fiber structure rather than letting it sit on top of the threads. The color goes deeper, looks richer, and bonds more securely. It is a small step that makes a visible difference in the finished result.
If the fabric feels soggy or you can see water sitting on the surface, blot it with a clean cloth and give it two minutes before you start.
Layering for Depth and Texture
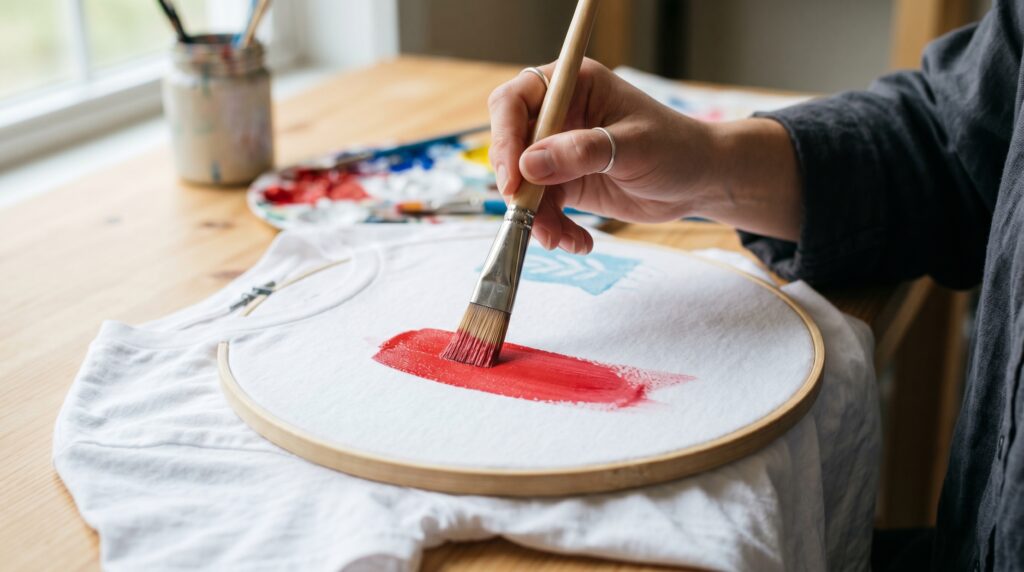
Load your brush with less paint than you think you need. Remove the excess on the edge of your palette before the brush touches the fabric. Apply in smooth, even strokes that follow the direction of the weave.
Let each layer dry completely before adding the next. Fifteen to twenty minutes between coats is usually enough. Two or three thin layers always produce better results than one heavy application. Thin layers stay flexible. Thick layers crack.
The difference between an amateur result and a professional one often comes down to this single habit. Thin layers.
Innovative Tools for Professional Finishes
Different tools open up techniques that a standard brush simply cannot produce.
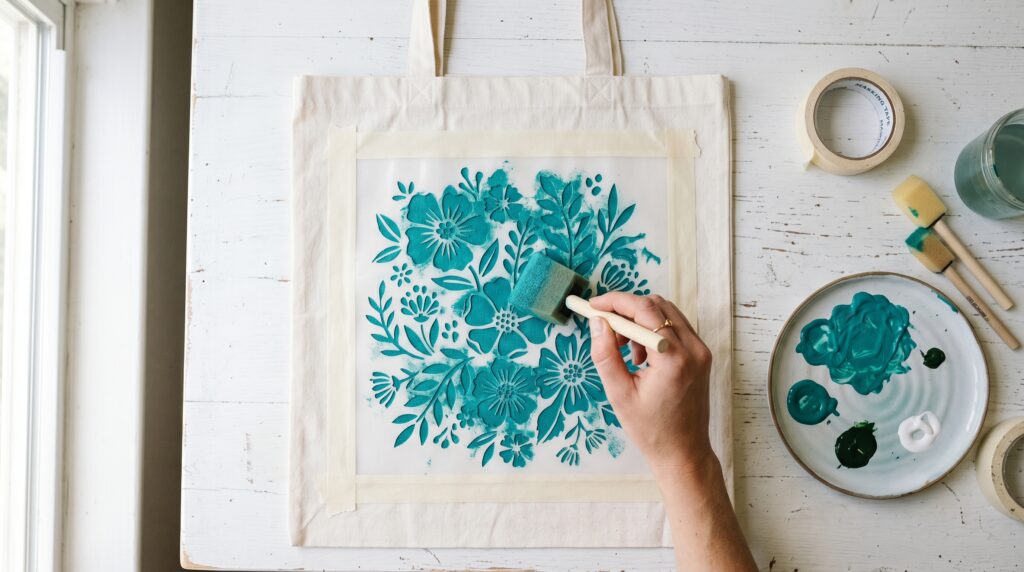
Stencils give you crisp, repeating patterns with very little skill required. Tape every edge firmly to the fabric before you start. Apply paint with a stiff sponge brush using an up-and-down stippling motion. Never stroke sideways or paint will creep under the edges and blur your lines. Lift the stencil straight up before the paint dries completely.
Piping bags and narrow nozzles let you apply paint in raised, dimensional lines for lettering, borders, and decorative outlines. Use paint straight from the tube for the most body.
Hot wax resist creates hard, perfectly clean edges that are impossible to achieve with a brush on flexible fabric. Apply melted wax along any line or area you want to stay paint-free. Paint freely over the whole surface. Remove the wax once dry to reveal sharp, protected edges underneath.
Sea sponges produce organic, irregular texture for backgrounds and faded effects. Dampen the sponge slightly, load it lightly, and dab rather than drag.
Step 3: Ensuring Permanence through Heat Setting
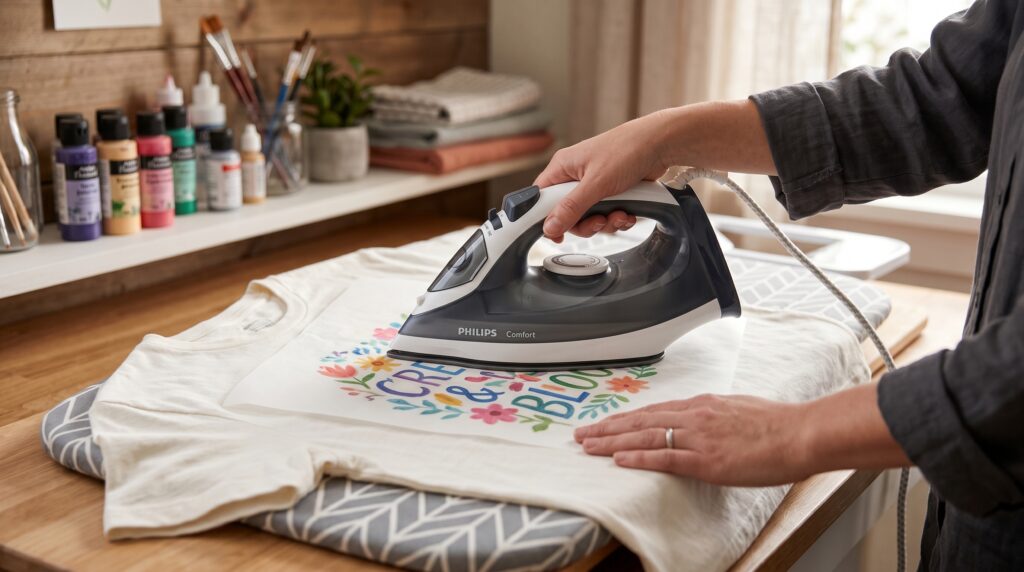
Everything you have done up to this point gets locked in permanently by heat setting. Skip this step and the design will fade and crack through washing no matter how carefully the paint was applied.
Heat activates the acrylic binders and drives them fully into the fiber structure. The bond becomes permanent. Water and agitation cannot break it.
The Professional Heat-Setting Protocol
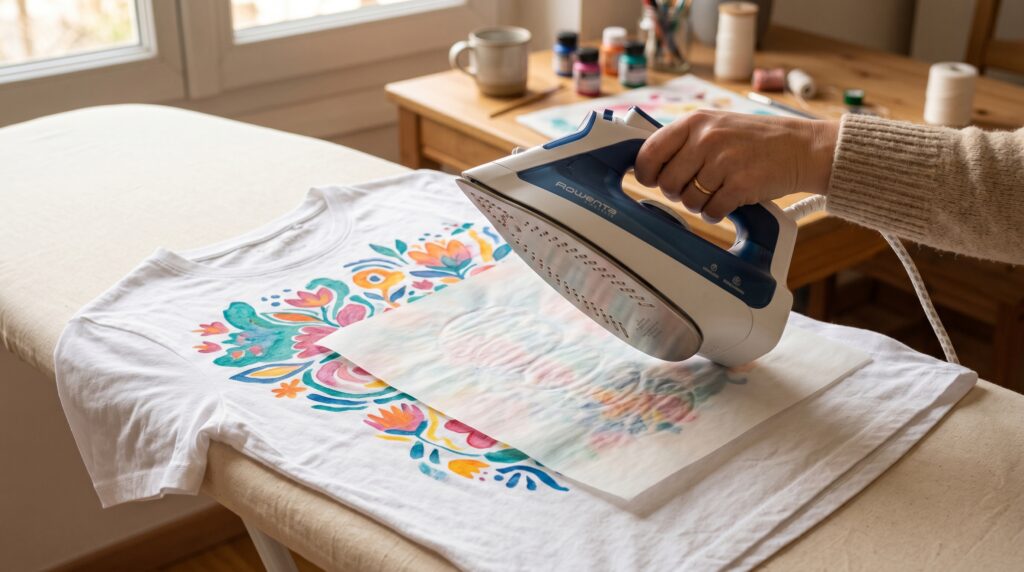
Wait a full 24 hours after the final coat. The paint looks dry on the surface long before the binders underneath have fully settled. Applying heat too early disturbs the bond instead of curing it. Give it the full day.
Switch the steam setting off completely. Moisture and heat together break the acrylic bond. Use a completely dry iron throughout.
Cover the design with parchment paper or a pressing cloth. Never let the iron touch the paint directly. Direct contact scorches the paint surface and leaves marks that cannot be fixed.
Keep the iron moving in slow, steady circles. Firm, consistent pressure across the entire painted area for four to five minutes on cotton, canvas, and linen. Three to four minutes on polyester blends. No more than three minutes on silk. Never hold the iron still in one spot.
Let the fabric cool completely before handling it. Moving the fabric while it is still hot can distort the bond before it finishes setting.
Step 4: Aftercare and Maintenance
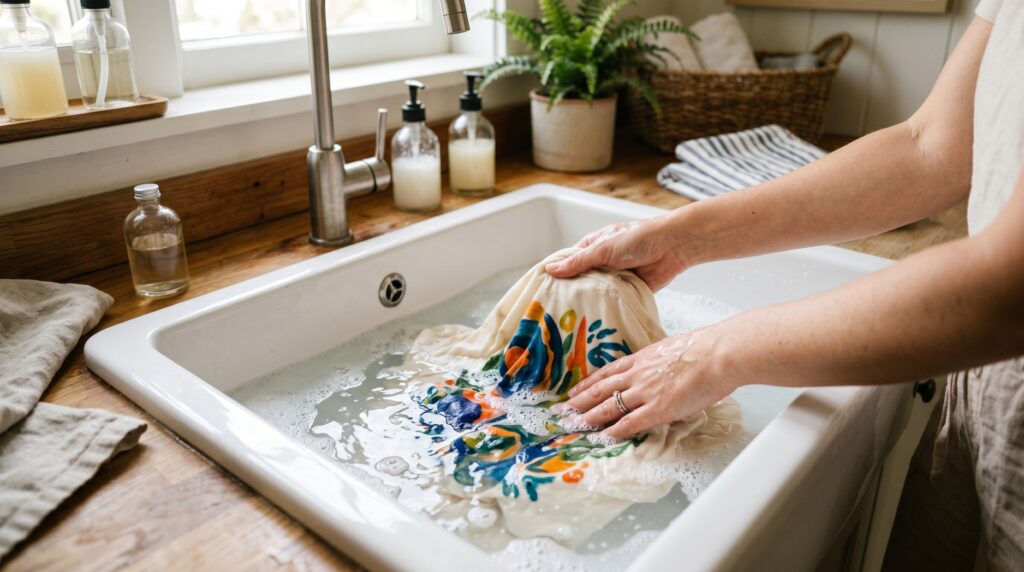
A well-painted, properly heat-set design can still be ruined by one careless wash. The curing process continues after heat setting and the bond responds to how you treat it.
Wait four full days before the first wash. The bond strengthens during this window. Washing too soon stresses a bond that has not reached full strength yet.
Always wash in cold water. Hot water gradually softens the acrylic polymer structure with every cycle. Cold water cleans the fabric without affecting the paint bond at all.
Turn the garment inside out before every wash. This reduces direct friction against the painted surface during the cycle and noticeably extends the life of the design.
Use a gentle or delicate cycle. High-speed agitation puts mechanical stress on detailed painted areas, especially anywhere with multiple layers.
Air dry rather than machine drying. Repeated dryer heat breaks down the paint bond over time. Air drying flat is the safest option for painted pieces.
Never dry clean a painted garment. The chemical solvents used in dry cleaning dissolve acrylic binders completely. One dry cleaning cycle can destroy a design that survived hundreds of machine washes.
Enhanced FAQ: Addressing Common Pain Points
Can I use acrylic paint on fabric without a fabric medium?
You can, but do not expect it to last. Without fabric medium, acrylic dries hard and stiff on the fabric surface. It cracks with the first movement and washes off within a few laundry cycles. The only situation where skipping the medium makes sense is for decorative wall hangings or display pieces that never get worn or washed.
What is the best fabric for acrylic painting?
Cotton is the best starting point for almost everyone. It absorbs paint evenly, holds color well, and gives you a smooth, forgiving surface to work on. Canvas is equally good and even more durable. Both are natural-fiber fabrics with tight weaves that draw paint into the structure rather than leaving it on the surface.
How do I stop the paint from bleeding past the edges?
Tape along any line where you need a clean edge using painter’s tape or masking tape. Make sure the stencil or tape is pressed flat with no gaps anywhere. Apply paint with a stippling motion rather than horizontal brushstrokes that run parallel to the edge. Remove the tape before the paint dries completely to avoid lifting the edge of the design with it.
How long does acrylic paint last on fabric?
With fabric medium, correct heat setting, and cold washing, acrylic on fabric lasts for years through hundreds of wash cycles. The three things that shorten that lifespan most reliably are skipping the fabric medium, washing in hot water, and not heat setting for long enough.
Can I paint on dark-colored fabric?
Yes. Apply one or two thin coats of white gesso over the design area first and let each coat dry completely. The white base stops the dark fabric from absorbing your colors and making them look dull or washed out. Without it, most pigments look significantly darker and muddier than they do on the palette.
What happens if I skip heat setting?
The paint stays soft and poorly bonded. It fades in the first wash and continues flaking off with every cycle after that. Fabric medium helps with adhesion but it cannot substitute for heat setting. The step is not optional for anything that will be worn or washed.
Executive Summary: The Path to Textile Excellence
Acrylic painting on fabric is one of the most satisfying creative skills you can pick up. The materials are inexpensive, the technique is learnable in a single session, and the results can be genuinely stunning when the process is followed correctly.
The steps that separate lasting work from failed projects are straightforward. Pre-wash the fabric to remove any coating that blocks adhesion. Mix your acrylic paint with fabric medium at a 2:1 ratio for standard coverage. Apply in thin layers and let each one dry before adding the next. Wait 24 hours, then heat set with a dry iron at low to medium-low heat for four to five minutes. Wait four more days before the first wash. Always wash cold.
None of these steps are complicated. Every single one matters. Follow them in order and you will produce work that holds its color, its detail, and its flexibility through years of real use. That is the standard worth working toward, and it is completely within reach from your very first attempt.